Wednesday, August 31, 2011

Tilapia Tacos with Lime Slaw

Hello blogger friends!  It's Wednesday, which means Friday is right around the corner for those of you who can't wait! I hear ya!  It will be here before you know it! :) 

WARNING!!! This post contains FAT, the stuff that is bad for us...but so good sometimes! We all can handle a little bit right??  If not, then my blog isn't for you ;)  I try to cook healthy for the most part, but I can't always do that completely... These pictures I will show you are greasy and shiny, but oh so good. :) Hope you guys stick around to see my dinner from last night!
Tilapia Tacos with Lime Slaw
This would be my husband's first taco, with his hand in the back ground.  I paid him for his time...joking!
Wowee doesn't that look delish! 

Tuesday, August 30, 2011

Spinach and Mushroom Stuffed Chicken

Good afternoon all my lovely blog readers! I hope you all are having a wonderful Tuesday!  I have been busy today, trying to figure out a dessert to make for our sweet tooth after dinner tonight.  I finally figured it out, and it is in the oven as we speak...drum roll please.......Peach Cobbler! Yum! I can't wait to try it, and share the recipe with you...soon! As for the recipe I will share with you today, it was dinner last night, and it was delicious! Ready, set, go!
Spinach and Mushroom Stuffed Chicken
MmmMmm

Monday, August 29, 2011

Whole Wheat Pancakes with Peanut Butter Chocolate Spread

Hi ya everyone!  I hope everyone had a great weekend, and your Monday is going just as good!  My husband and I don't really get weekends right now.  He is working 7  12 hour shifts....UGH I know.  He is making it, and so am I.  This blogging really does take up a lot of time, but I really REALLY enjoy it. 

This morning I made these yummy pancakes, and peanut butter chocolate spread, that just topped them off.  I usually ALWAYS spread peanut butter on my pancakes, waffles, and french toast.  This morning I was looking in my cupboard for something a little different...then I saw the cocoa powder.  I immediately thought peanut butter chocolate! Who doesn't like that combination?! Am I right, or am I right? :)  I grabbed the cocoa powder, peanut butter and away I went.  Here is the final picture atop the whole wheat pancakes that I will share with you also.
Whole Wheat Pancakes with Peanut Butter Chocolate Spread


Sunday, August 28, 2011

Stovetop Mac and Cheese with Broccoli

Good afternoon to all of you! Hope you have had a fabulous day so far!  I am posting later today because I have been busy.  My husband and I decided we want a new television, so I went to Costco to check them out, and have been looking online at all the options, and comparing prices.  Most of you don't know that my husband and I live in an RV while he is working away from home.  We have a little 19" TV right now, and it is just about lived as long as it can.  We have to crank the volume almost to the max to hear it well.  We are limited with the space we have to work with, so we are thinking of replacing it with a 27" or 32" flat screen.  We would have to buy a  wall mount because it wont fit in the slot where our TV is now.  We are hoping the wall will be able to hold it, because these walls aren't very thick.  I am not really sure what they are even made out of, probably some really thin wood.  We are going to look into it more tonight, and hopefully be able to buy a new one soon!  Enough about that, let's get on to what I made last night.
Stovetop Mac and Cheese with Broccoli

Saturday, August 27, 2011

BTA Wraps(Big twist on the BLT)

Good Afternoon everyone!  Hope you are all doing great!  I got out and did a little shopping today, but it was so hot, I'm glad to be back home in the air conditioning!  I had some leftover bacon from my breakfast quesadilla yesterday, so I thought I would use it up today, and not have to cook until dinner tonight! I came up with a BTA Wrap.  Bacon Tomato, and Avocado Cream.  YUM! Boy am I glad I did! :) That means TWO recipes today, hold on to your britches! Here is the final product to get your mouth watering.

BTA Wraps

Friday, August 26, 2011

Spicy Egg and Bacon Breakfast Quesadilla

Good morning blog readers! As I write this I am enjoying my breakfast this morning, A LOT! As we speak I am digging into my Spicy Egg and Bacon Breakfast Quesadilla I just came up with.  It is yummy! I think this is a new favorite for a morning when I want something nice and savory to go along with my coffee.  This would be perfect for a Sunday morning breakfast(or any day:))  This would be great for brunch, when you have family or friends over, or just sit and enjoy it by yourself like I am. :)  I love spicy food, but my husband can't handle much at all, so I usually never get to enjoy it, so this morning I went all out.  If you are like my husband and don't like much spice in your life, then you can completely leave out a couple ingredients, or substitute them.  I'll give you some options.  Here goes!
Spicy Egg and Bacon Breakfast Quesadilla

Thursday, August 25, 2011

Chocolate Mug Cake

Whoa, are you ready for this?! I'm not sure anything can prepare you for what I am about to show you, and share with you! I am in LOVE... Introducing my new favorite easy cake, that I will quite literally make for myself on my birthday! It is is SO easy, and delicious!  I found the recipe here.  http://diethood.com/2011/08/04/chocolate-mug-cake-happy-birthday/  I love browsing this site, she is a great cook/baker. I thank her for sharing this amazing recipe!(I added one little special thing, I'll tell you about:))  Alright, fine I'll quit talking since I got you all excited, here it is.....
Chocolate Mug Cake

Wednesday, August 24, 2011

Whole Wheat Focaccia

Good afternoon all my lovely blog readers! Hope everyone is having an awesome day! It sure is hot in my neck of the desert?? :) I wouldn't be able to handle this heat without air conditioning.  Yesterday I made Whole Wheat Focaccia bread for the FIRST time, and it turned out amazing!  I followed a recipe from this book:
This book was published in 1996, so it is 15 years old!  I discovered this gem at Hastings while I was browsing through the healthy cooking isle.  It is used, sort of obvious being that old, and the price tag on it said.......$2.49! Wow, I just couldn't pass that up!  With more than 200 recipes! It's and oldie, but goodie.
There will be plenty of recipes coming from this book, considering the focaccia bread turned out great.  It was seriously really simple too. Most of the time it takes, is waiting for the bread to rise. You all have to try this! My husband loved it by the way.  We had it for dinner last night along with my simple spaghetti, that I will post tomorrow.
I followed her recipe, except for one thing which I will explain as we go.
Whole Wheat Focaccia
Ingredients:
  • 1 1/2 cups whole wheat flour or spelt flour, or 3/4 cup unbleached all-purpose flour plus a little extra for kneading (I used all whole wheat flour)
  • 1 package(2 1/2TSP) active dry yeast
  • 1/2TSP sea salt
  • 3/4 cup nonfat yogurt or buttermilk (I used nonfat plain Greek yogurt)
  • 2TBLS extra virgin olive oil
Topping:
  • 1 or 2 garlic cloves, pressed or finely chopped(I used 3, we LOVE garlic)
  • 1 1/2TBLS extra virgin olive oil
  • 4TBLS dried herbs, such as thyme, oregano, basil, or rosemary (I only used 2TBLS, I really think 4 is over doing it.  I used 1TBLS thyme, and 1TBLS pizza sauce herb mix.  I had that left over from a previous meal I made, and it sounded like it would work perfectly)
  • 1/4TSP sea salt
  • Pitted Kalamata olives, halved(optional) (I didn't use any)
  • Sun-dried tomatoes, chopped(optional)(I didn't use any, but would probably be really good)
  • Feta cheese(optional)(I didn't use any, GASP! I know, but I wanted to experience Focaccia on it's own, simple and delicious)
Sift flour into a large mixing bowl and add the yeast and salt.
Gradually add the yogurt or buttermilk and oil until you have a kneadable dough. (the dough is kneadable when it is too stiff to stir and begins to pull away from the sides of the bowl)
Turn out the dough onto a floured surface. Knead the dough for 5 minutes, adding as much additional flour as necessary to keep the dough from sticking to the kneading surface; it will be slightly softer and stickier than a regular yeast bread. (please don't look at my "really in need of lotion" hand, concentrate on the dough:))
Rinse the bowl in which you mixed the dough, then oil. Place the kneaded dough in the oiled bowl and turn the dough to coat with oil. Cover the bowl with a clean, damp cloth and let the dough rise in a warm place until doubled in size, from 45 to 60 minutes.
Meanwhile in a small bowl mix the garlic, olive oil, herbs, and salt. Let the mixture sit until you are ready to bake the focaccia.
I snuck this cool picture while my dough was rising.

Punch the dough down. Knead it again and roll it out evenly to approximately the size of your baking sheet or pizza stone, shaping to a round loaf.  Transfer in onto an oiled baking sheet or a pizza stone sprinkled with cornmeal. ( I don't know why she didn't put cornmeal on the ingredients list??) I poked holes in it before I put it on the baking sheet, oops.

I love how you can see the grains

Using your fingers, poke little holes about 1/4 inch deep all over the top of the dough at 1 inch intervals.  Spread the garlic mixture over the dough, allowing it to drip into the finger holes.  If desired, add olives and/or sun dried tomatoes.(Don't forget I only used 2TBLS of herbs. See how much that is??)


Let the dough rise in a warm place again until it has double in bulk, 45 to 60 minutes.

Preheat oven to 350 degrees F.
When the dough has risen, place the baking pan or stone on a rack in the middle of the over and bake the focaccia until the bottom is light, crispy brown, 20 to 25 minutes.(Mine was done in 20 minutes)
If adding feta cheese, do so 5 minutes before removing the focaccia from the oven.  Remove the bread from the oven, let cool for 10 minutes, cut into wedges, and serve warm.


This Focaccia was delicious! Let me know if you make this! You really should, it is so easy and SO good!
Question of the Day:

Have you done much bread baking, and if so, what is your favorite?

I haven't explored bread baking very much besides, banana bread, zucchini bread, that sort of thing.  This is the best savory bread I have made so far though.

Well you all have a great day, and I will see you tomorrow!

Tuesday, August 23, 2011

Trial and Error, Baked Chicken Taquitos

Good Morning everyone! This recipe is my first one on the blog that didn't turn out exactly the way I wanted it too, but that's alright because I said in my first post, that I will post recipes even if they end up needing tweaking, or a little something extra.  The only thing that I didn't like about my Chicken Taquitos, is that the corn tortillas, during baking, split open. :(  When I opened up the package of corn tortillas they were soft and seemed pliable, so I just went for it.  They rolled up just fine, but when baking them, they split open.  Which truthfully didn't stop my husband and I from enjoying them, one bit, but they just weren't as pretty as I was hoping.  I did some research online this morning, and found that if you bake corn tortillas they need a lot of moisture. Some people dipped them in simmering chicken broth, water, or just sprayed them with water, before they baked them.  I think next time around I will dip them in water, stuff them, roll them up and bake them.  I still like the idea of baking them rather then frying, because it cuts out a lot of fat.  I must say that the stuffing I made for the inside was yummy! That definitely wasn't a trial and error at all.  I will use the same recipe next time, but maybe add a tiny bit more Cumin, and Chile Powder.  Please let me know if any of you have any other ideas on how to bake corn tortillas without them cracking, I would love more ideas! 
Baked Chicken Taquitos
Ingredients:
  • Chicken Breasts, cooked and shredded.  I used 8 chicken tenders and boiled them, then shredded them
  • A large Ziploc Bag
  • 1/2 cup Green Pepper, diced
  • 1/2 cup Green Onion, diced
  • 1/2 cup Carrot, shredded
  • 1TSP Olive Oil
  • 1 small can Green Chilies(sorry I didn't look at how many ounces) but there are usually only two sizes in the store
  • 3TBLS Sour Cream
  • 1/2 TSP Cumin(or a tad more)
  • 1/2 TSP Chili Powder(or a tad more)
  • 1/4 TSP Garlic Powder
  • 1/4 TSP Onion Powder
  • 1 cup Pepper Jack Cheese, shredded
  • Corn Tortillas
  • Flour Tortillas(I personally liked the Corn better, but both are good)
  • Dipping sauces. Whatever kind you prefer. I served mine with, homemade guac, salsa, and sour cream

I didn't take a picture of cooking the chicken because everyone has there own way of doing that. Whatever way suits you. Here is the chicken after I shredded it.
Place the chicken in a bag, and open up a can of Green Chilies, which to my husband and I, is HEAVEN.  We would eat Green Chilies out of the can if we could...YUM
Add the Green Chilies to the bag with the Chicken.
Dice up the Green Pepper, Green Onion, and shred the Carrots. I used baby carrots, so they were already peeled, if you want to go that route.
Add the Olive Oil, and veggies to a skillet, and saute until tender, or to your liking. Let cool, then dump it in the bag with the chicken.
In a little dish, add the Sour Cream, Cumin, Chili Powder, Garlic Powder, and Onion Powder. This cute little glass dish I used, I bought from my Grandma's garage sale a LONG time ago. I bought eight for fifty cents, what a deal right? She has passed away now, so I treasure these little guys.

Mix it up

Add it to the bag, with all the other goodies.

Close the bag, and roll it around to get all the ingredients incorporated, and that lovely sauce on everything. Refrigerate for 1/2 hour or so to let the flavors mingle.  Grate the Pepper Jack Cheese, and steal a couple bites, it's a must. :)
Now this is the point where you would heat up some water, or chicken broth, and dip the corn tortillas in it for a couple seconds. (which I did not do. BOO me!) You cook, and learn, then you cook again. Lay the corn tortilla out on a flat surface, and spoon in  2TBLS of the filling.  I added a tad more because I wanted to only eat a few at dinner, and not like 6 little guys.  Save some calories without eating more tortillas. It is up to you though, because Taquitos are normally little thin guys.
Sprinkle on some delicious cheese
Roll up, and place on a foil covered baking sheet.  I made flour tortilla taquitos too, and you don't place them in the water, just wrap them up! I also sprayed some cooking spray on them after I was done filling all of them.  I was hoping this would help create a crispy brown top, but nope it didn't. The flour tortillas came out crispy, but looked exactly the way they did in the beginning, so don't let that fool you on the cooking time, which it almost did for me.
MmmMmm
Bake at 350 to 425 degrees.  I started at 350 then turned it up to 425. Maybe the higher heat contributed to the cracking of the tortillas?? Near the end of cooking I turned it on to broil, to see if I could get the tops to brown a little and it didn't. Bummer, oh well. I learned. Here are my poor looking taquitos. ;)
The corn tortilla taquitos still held together perfectly when transferring them to a plate, so really if you don't mind how they look, and want to skip that water step, then go for it.  Even though they don't look the best, they still taste the same, and that is delicious! Enjoy! Let me know if you have any suggestions, please!

Question of the Day!


There are so many low fat, fat free versions of just about everything out there, are there any items that you have tried the low fat, fat free version and didn't like at all, so you refuse to buy it, and just stick to the "full fat" version?? Anything you think of??

This one is pretty easy for me. When I do buy Cheese Its, I HAVE to buy the full fat version, and the Cheese It name brand.  I have tried the others, and they are NOT the same!  Also, I do buy low fat Mayonnaise, but cannot stomach the fat free kind, ICK! I buy fat free milk, which I used to not like. Used to only drink 2%. Whole milk, makes me feel like I need to chew, ULTRA ICK.

Hope to hear from you all! Have a good rest of your day!!

Monday, August 22, 2011

Fried Rice

Hello all you blog readers!  Thanks a bunch for the comments, I really do LOVE reading them!! It also shows that I'm not talking to myself, so I'm really not that crazy! ;)  Thank you! Keep em coming! :)

The night before last my husband and I were given some cooked Jasmine rice from our neighbor here along with some yummy smoked  beef brisket.  My neighbor cooked it for a LONG time, and shared with us. It was mighty yummy! Now my husband wants a smoker, go figure. :) Needless to say last nights dinner was fried rice, and smoked beef brisket.  It was awesome! Here is my fried rice recipe I threw together last night.  I just used up veggies I had left in my fridge. I have to say this was the best fried rice I have made though.
Ashleigh's Fried Rice

Ingredients:
  • About 3 cups of rice.  Any rice will do, I would probably have used brown rice, but the Jasmine rice was yummy. (Thank you Rini!)
  • 2 TBLS Olive Oil
  • 3/4 cup fresh Green Beans, cut into bit size chunks(I used less because that was all I had)
  • 1/2 cup Red Onion, diced
  • 3/4 cup Red Bell Pepper, diced
  • 3/4 cup Broccoli Slaw, diced up...secret veggie that you can't even tell is there :) I used the packaged broccoli slaw you get at the store, so it has some carrots, and red cabbage in it also.
  • 3 Cloves of Garlic, minced
  • 3 eggs
  • 4 TBLS Soy Sauce.  I use the reduced sodium Soy Sauce(I don't like too much soy sauce to over power everything, so adjust the amount to suit you)

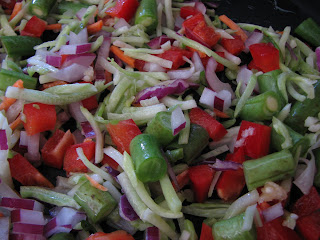
First cut up all your veggies

Add olive oil, veggies, and garlic to pan.  Cook for a few minutes.
MmmMmm yummy goodness
Add rice to pan, and cook for a little while.  Until the rice is heated through.

Add in 3TBLS of soy sauce, and fry it! I like mine to get a little crispy on some pieces.
Whisk eggs.  Clear a little area in the same pan, and pour the eggs in.  Cook, then stir all together.
Add the remaining TBLS of soy sauce, mix together, and it's done! YUM!
ENJOY!

Question of the Day:  (Also, I figured I am asking you all questions, I better answer them too!)

What is your favorite type of rice, and how do you like to eat it?

Alright confession time, :) I LOVE plain old white rice, and I could eat a big ol' bowl with butter and salt. Holy YUM! BUT...I don't do that very often at all :( instead I cook brown rice, and it just isn't the same! Healthier though for sure, so I am alright with that.
Well I'm off of here for the day, talk to you all tomorrow!

Sunday, August 21, 2011

Mini Frittatas

Good Afternoon! Hope everyone had a lovely morning! I did, and I have been enjoying a little time in the kitchen this morning.  I had some Reddiegg Real Egg Substitute to use up, so I decided on some cute and tasty Mini Frittatas that are packed with veggies, AND cheese! YUM!  These were simple to make, but not quite as simple as throwing together some scrambled eggs, or an omelet with all the fixings, but these are totally worth it because they are cute, and in individual servings! You can store them in the fridge, pop a couple out when you need a snack, or for breakfast in the morning. 
Ingredients:
I only had enough Reddiegg to equal 4 eggs, which made 6 Mini Frittatas.  Adjust the ingredients if you want to make more, it would be simple!
  • 4 Eggs
  • 4 Fresh Green Beans, sliced really small
  • 3 baby Carrots, sliced really small
  • 1 TBLS Red Onion, diced small
  • 2 Garlic Cloves, minced
  • 3 fresh Basil Leaves, diced small
  • sprinkle of Olive Oil
  • sprinkle of Mrs. Dash Garlic & Herb seasoning
  • sprinkle of Seasoned Salt
  • sprinkle of Onion Powder
  • pinch of Salt and Pepper
  • Colby Jack Cheese for topping
  • Feta Cheese for topping
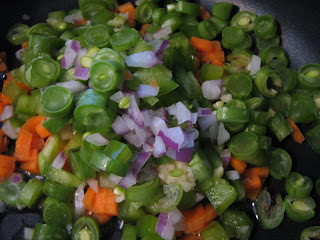
Dice the green beans, carrots, onion, garlic, and basil.
Sprinkle olive oil in a pan, and throw in the veggies, but leave the basil out.
Add in Mrs. Dash, Seasoned Salt, and Onion Powder.  Saute until just about tender.
Whisk eggs in a small bowl
Add in fresh basil, and veggie mix. Stir, and scoop into greased standard muffin pan.  I used a 1/4 cup for each frittata.
Bake at 350 degrees.  Three quarters the way through cooking, sprinkle cheese on top.
I baked these for about 18 minutes.  Tada, done! Yummo!
Tons of veggies, and gooey cheese! MmmMmm! Enjoy!


Question Of The Day:
What is your breakfast staple every morning, or do you switch it up frequently?

Have a good rest of you day everyone! Catch ya tomorrow!
Thank you for stopping by! Please come back soon!